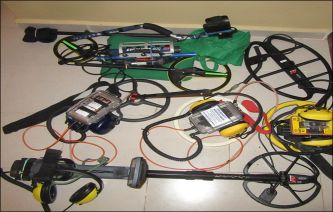
Best year ever–27 ozs.
Grades: “The Big Picture”
The overall grade of a shoreline site is the most important thing to understand. This is critical “make or break” site knowledge. Ive even seen top pro hunters get into a site and waste time up on ground that was just too high to have any heavy targets. It’s also important to recognizance the fact that there are different kinds of high ground. First there is high ground that’s part of solid, unchanging grade. In that this ground is stable—there’s a chance of it having some good finds. This material changes slowly and because of this permanency, it gives you access to more time of the site’s functioning. At other locations the grade can be poor—bare coral with no targets, or hardpan inches below the surface—again–critical knowledge but these facts still have to be discovered .
Second there’s overburden. This is material that has been pushed to a location as silt. Waves or currents’ have dislodged material and caused it to build up in a particular area. By it’s nature it cannot contain anything heavy and usually the only metal objects in will be flat sided ones—dimes, caps and tabs that are tossed and rolled with the sand. This is an important principle to understand—the distinction between items that can be moved with the current and those that can’t. Many sites present this way in spring—winter storms have classified targets according to how they respond to the actual waves—by weight and shape. Where you see this type of targets—with a few pennies and dimes mixed in—this is overburden sand. Clues that will allow you to understand the overall grade are:
-how it “eye’s up” in relation to the rest of the grade. How low is the ground? I often look at how high the water and sand levels are by looking at swimmers at different parts of the beach—where you see people is waist or chest-deep water close to the shoreline—go there right away!
-correspondingly–how close to shore you are. You are always more likely to access more solid material in close to shore. In a previous book I suggested that readers look for “the deepest water, closest to shore”.
-the kind of targets coming up—as mentioned above—tabs, caps and pennies area bad sign, quarters, fishing sinkers and iron are good signs.
-the consistency of the material you hit when you dig. Black, grey sand, gravel, shells are good signs, wood, leaves, “bog” material are bad signs.
These ‘tools” for assessing the overall grade of the sties you hunt should shape your entire strategy—directing you to focus upon a particular section or keep scouting around.
In-Water Contours and Berms
My previous book “The Gold Jewellery Hunter’s Handbook” (2016) went into quite a bit of detail on how to understand what the shape and detail of the bottom is telling you. This is also critical knowledge.
A berm is a high section of sand in the water. As discussed above a berm can either be permanent and productive or composed of “silt” and unproductive. The contour of a berm is also important. Quite often, where you have dramatic sea change it begins in the form of the shoreward side of berms being eroded away. When these are old underwater structures this can mean old targets being exposed. As well—when this shore-wards side of a high areas is being washed away—more of the downward slope into deeper water is exposed. This can be unhunted, solid ground.
Trenches and Gullies
Often where you have high general sand levels, the only productive ground will be at the bottom of any trenches or gullies. This can be only a six-step ‘swath” sometimes running along an entire beach. As well, the actual shape of these trenches is important in that where you have a trench with flat ground at the bottom (termed a “floor”) this can mean more productive ground to hunt. At the shoreward side of a trench—a flat slope will often move away from the base or “marl” whereas when you see a low, curved contour—this can often mean ground that is low enough to keep more of the base within detector range. A trench that is abrupt—dropping off sharply, is also a good sign. This means that sand is being moved around with considerable force—rather then just the gradual, gentle contours that result from silt being washed around.
Where you see these formations in the water, try to spot something on shore to landmark your location with. This will not only help you to return and monitor the section but also to see if there has been movement—forward, back into deeper water, or laterally. As with the example above, having the patience to return again and a again to monitor a section that shows contour changes can result in some great finds.
Also, the distance between each trench or gully is also important in that where you see longer distances—there is more room for each trench to be deeper—and more productive.
Last, and probably most important is the sidewall. I divide this into two areas to be observed: the slope or “draw” and the “first belly”–the initial curve as the water gets deeper–and the area leading into the first trench. Most shoreline gold is found in these two areas.
Lets start by looking at some sidewall variables: The first and most obvious sidewall variable is location itself. As touched upon above, tides, rain or other water events an move the entire sidewall back, or fill it in—adding sand. When a sidewall is moved back, this is termed a “strip-out.” This is another thing that’s important to learn to recognize. The most obvious sign of a “strip out” is when you are finding targets there were not there the previous day –or even that morning. This is why I find it laughable when hunters leave their junk in the water—to be “tricky.” Seeing the beginnings of a strip-out at a high-end site can be the most exciting hunt ever and to be able to tell where new targets are being exposed depends upon removing everything you dig up. The best shoreline erosion event I’ve ever seen was when a resort beach in the Caribbean opened up for about six hours. I found 15 gold rings, mostly 18k and my buddy found 16. Changes to a sidewall can also be in the form of a contour change—where the angle drops off, or becomes concave—exposing old ground. It’s important also to recognize that the edge grade will often be composed of more solid sand than the ground further out—the result of waves pounding and compressing sand over time. This ground can be the only area that is solid enough to hold targets—especially in “sanded-in” conditions. DIAG (It’s also worth noting that this slope is not easy ground to detect. The steeper the grade change here the more interference there will be. A lot of targets are missed on this slope by hunters who try to work too fast, or walk parallel to shore. This is especially true in salt water. When you do this the interference combines with the effect of the incoming water and overloads the coil. (I’ve gotten a lot of big, heavy gold rings that were too deep for VLF hunters by using a pulse on this sidewall—slowly working up and down the hill).
The “first belly” is also a key area of any site. It’s where the water gets deep enough for jewelry to be lost. Where this ‘belly” meets the sidewall is also and important part of the shoreline. It’s where the hardest packed sand often is, and where many changes occur first. As well—a lot of heavy objects lost on the entire sidewall roll or slide down and end up there. PIC As we move further down into the water, this first basin will often be full of soft sand. There may just be a gradual slope into deeper water. These are also critical areas to assess and monitor.
From: “Water Hunting: Secrets of the Pros: Volume II” by Clive James Clynick (Prestige Publishing 2017)
The post Book Excerpt: “Grades: The Big Picture” appeared first on Clive's Gold Page.